
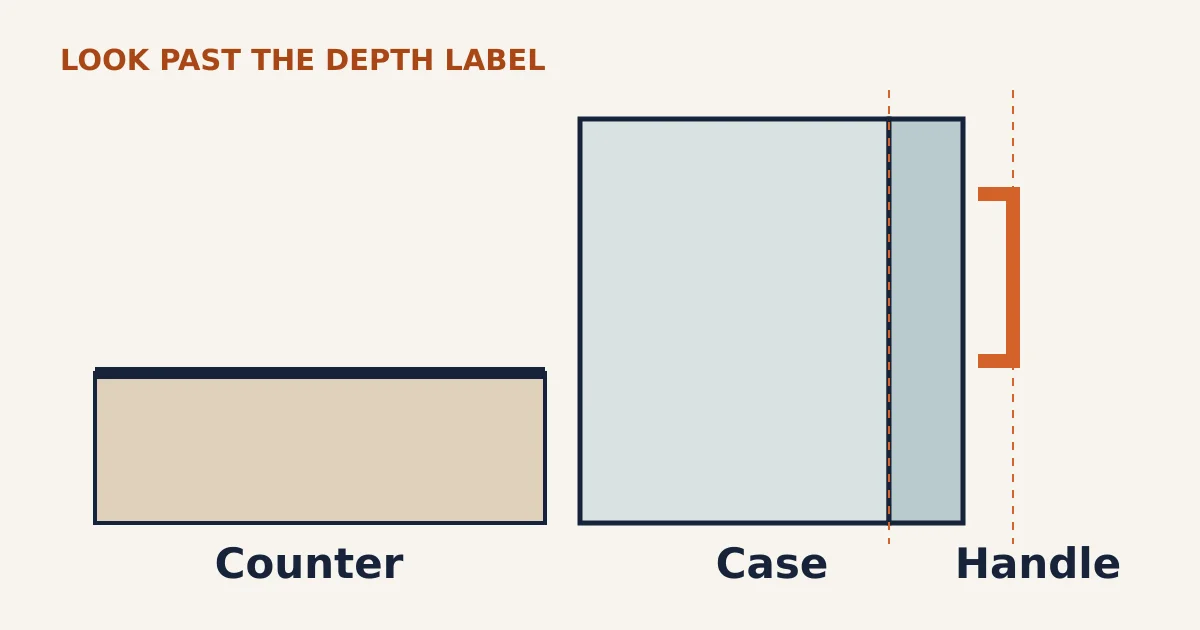
“Counter-depth” does not promise that every part of a refrigerator will line up with the countertop. The cabinet box, closed doors, handles and required space behind the appliance are different measurements. Check the exact model’s drawing against the actual counter before treating a projecting door as an installation mistake.
The new refrigerator arrives, slides into the opening and still stands several inches proud of the cabinets. The label said counter-depth. The photograph looked almost flush. What went wrong?
Possibly nothing: GE distinguishes counter-depth models from completely flush built-in refrigerators. The useful question is which part was meant to align, and whether the remaining projection fits the kitchen’s walking space and door operation.
Ask which depth the advertised number describes
Start with the model number, not a category filter. A specification may list depth without the doors, depth including the doors, depth including the handles, and depth with a door open. Those numbers describe different envelopes. Beko’s BFFD30216SSIMX sheet separates door and handle depths and identifies additional rear spacers; its figures belong to that model, not every counter-depth refrigerator.
Even a description that sounds particularly precise needs its footnote. Whirlpool’s True Counter Depth description for WRFC3036RV qualifies the cabinet comparison by excluding doors. Read the current specification and installation guide together before transferring a marketing dimension onto a cabinet plan.
| Dimension | What it helps answer |
|---|---|
| Case depth, doors excluded | Where the refrigerator’s main box sits relative to the cabinets. |
| Closed overall depth, with handles | Where the furthest closed part reaches into the room. |
| Required rear spacing | How far forward the approved installation positions the appliance. |
| Open-door and drawer dimensions | Whether the refrigerator can actually be used in the available space. |
Use one wall line for both measurements
Our depth worksheet starts with a shared reference: the finished wall behind the refrigerator and adjacent countertop. Measure from that wall to the countertop’s front edge. Separately record the model’s overall closed depth and its required rear spacing. A baseboard, projecting connection or other obstruction needs the installer’s attention; it is not permission to ignore the manufacturer’s positioning requirements.
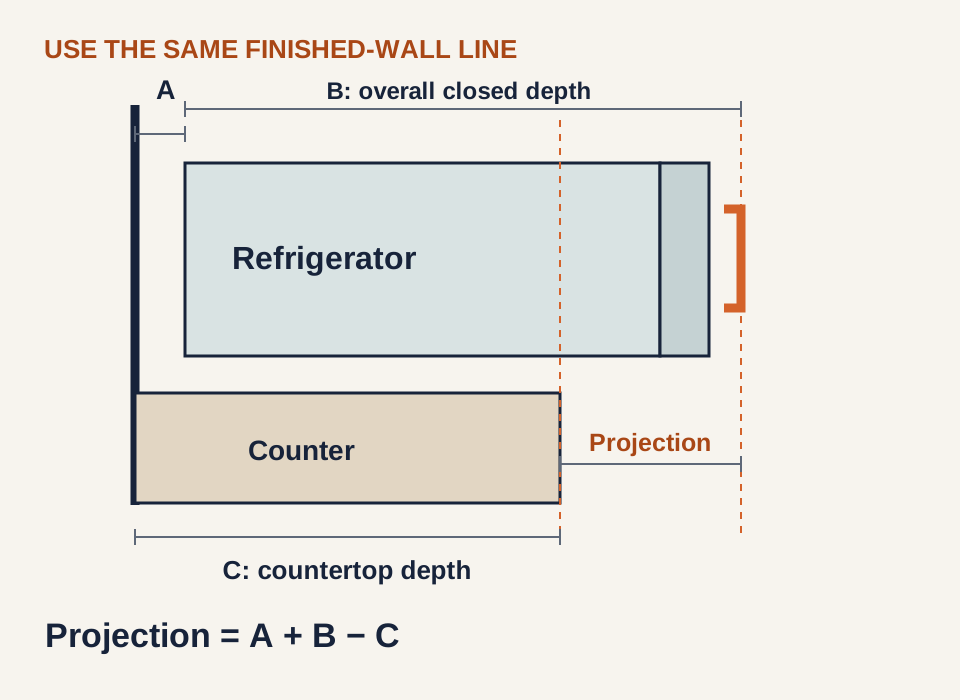
For a simple rectangular arrangement, the comparison is installed closed projection beyond the counter = required rear spacing + overall closed depth − countertop depth. Use compatible definitions: do not add door or handle thickness again when the overall depth already includes them. The result is a planning comparison, not an installation approval.
For example, assume a hypothetical refrigerator is 29 inches deep including its handles, its approved layout requires 1 inch behind it, and the countertop reaches 25 inches from the same wall. The closed front projects 1 + 29 − 25 = 5 inches beyond that counter. Those are illustrative inputs, not standard dimensions or recommended clearances. If the space has a recess or an offset wall, ask the designer to draw the actual geometry rather than using this simplified subtraction.
Do not solve projection by removing required clearance
The temptation is to push the refrigerator backwards until the front looks right. That can conflict with the space required for the specific appliance. GE directs buyers to their model’s installation instructions for air clearances. Bosch likewise combines cutout measurement with ventilation and door-swing checks. Generic buying-guide figures do not overrule a model-specific drawing.
Connections can also change the required cavity arrangement. Fisher & Paykel’s RS2474 planning guide shows different cavity depths depending on where services are located. This integrated product is not a substitute specification for a freestanding refrigerator; it demonstrates why the location of required services belongs on the plan.
A tidier front still needs usable doors
Before choosing a shallower or more integrated alternative, check the hinge-side wall, adjacent cabinet hardware and the island in front. The closed outline alone cannot show a door’s moving envelope. Sub-Zero notes that door and drawer clearances vary by model. Miele’s KF 28x2/KF 29x2 manual includes separate open-door dimensions and a collision check.
Hinge designs differ, too. LG describes special limited-clearance hinge designs on selected models; that is a model feature, not a property of every French-door refrigerator. Liebherr’s freestanding design guide specifies different wall-side clearances for different models. A fixed universal filler width would miss these differences.
What to approve before ordering
- Name the intended alignment. Is the objective a near-aligned case, a particular door face, or a genuinely integrated front?
- Keep the drawing and footnotes. Record the exact model and which depth includes the doors, handles and required spacing.
- Draw the closed front. Mark the resulting projection on the kitchen plan and compare it with the island or opposite counter.
- Check operation separately. Ask the supplier to confirm the required door positions for daily use and drawer or shelf removal.
- Resolve discrepancies before delivery. Have the retailer or installer explain the proposed fit in writing rather than assuming a label guarantees it.
Samsung explicitly acknowledges that counter-depth doors and handles can still extend beyond cabinets. The goal is an understood projection that works in the room, rather than a nominal depth that only looks reassuring on the product card.
Sources and method
Manufacturer descriptions and technical drawings checked October 25, 2026. The common-datum worksheet and hypothetical arithmetic are Build It Out’s editorial synthesis. No appliance installation, product test or professional approval is claimed.
- GE Appliances: Counter-Depth or CustomStyle Refrigerators, plus its model-clearance guidance linked above.
- Samsung: What Is a Counter Depth Refrigerator?
- LG: Refrigerator Buying Guide
- Whirlpool: WRFC3036RV product details and depth footnote
- Bosch: Refrigerator Buying Guide
- Sub-Zero: Door and Drawer Clearance
- Beko: BFFD30216SSIMX specification sheet, pages 3–4.
- Miele: KF 28x2 SF / KF 29x2 SF operating and installation instructions, pages 25–27.
- Fisher & Paykel: Integrated Refrigeration Planning Guide, product/cavity and door-opening sections; manufacturer document hosted by Device.report.
- Liebherr: Freestanding Appliances Design Guide, model dimensions and door clearance; manufacturer document hosted by Device.report.